Build container images with kaniko in Kubernetes - HostExpert
January 3, 2023
First of all dont forget to check out our new VPS OFFERS or Dedicated OFFERS and get UpTo 50%
Use kaniko as an alternative to Docker for building container images in Kubernetes clusters.
There are a couple of issues with using Docker to build custom images within a Kubernetes cluster.
First, running Docker in a container requires open communication with the Docker daemon running in Kubernetes nodes and that is considered a bad security practice.
Even more, Kubernetes will completely remove the support for Docker as a container runtime after v1.22. The container runtime of a cluster is responsible for pulling and running our container images.
The problem with using Docker as our container runtime in clusters is that it isn’t compliant with the Cointainer Runtime Interface and wasn’t designed to be embedded in Kubernetes.
This change, fortunately, doesn’t affect the usage of Docker images in our clusters as these images aren’t Docker-specific but OCI Open Container Initiative images. That means that images created with Docker will work with all CRI implementations. All our existing images will still work exactly the same.
But it will affect our ability to build Docker images with the Docker engine as this will no longer be supported in Kubernetes.
kaniko for building container images
kaniko is a tool to build container images from a Dockerfile but is suitable for running inside containers and Kubernetes clusters.
The difference is that Kanino doesn’t depend on the Docker daemon and runs completely in the userspace, so by using it instead, we avoid all the issues mentioned above.
kaniko is meant to be run as an image: gcr.io/kaniko-project/executor. The kaniko executor image is responsible for building an image from a Dockerfile and pushing it to a registry.
Within the executor image, the filesystem is extracted from the base image (the FROM image in the Dockerfile). Then the commands in the Dockerfile are executed, snapshotting the filesystem in userspace after each one. After each command, a layer of changed files is appended to the base image (if there are any) and image metadata are updated.
Demo
Time get our hands-on and try it. We’ll need a Kubernetes cluster and a dockerhub account. To simulate a Kubernetes cluster I am going to use the Kubernetes mode from Docker Desktop, which provides us a single node cluster.
kaniko is using the concept of a build context in order to represent the directory containing a Dockerfile which kaniko will use to build the final image. For the needs of this short demo, we’ll use this Github repo as our build context. Other possible supported storage solution alternatives include GCS Bucket, S3 Bucket, Azure Blob Storage, Local Directory, Local Tar, Standard Input.
When running kaniko, we are going to use the --context flag with the appropriate prefix to specify the location of our build context.
We also define the --destination flag which defines the destination where we would like to push our newly generated Docker image. In our case that’s dockerhub.
The last thing to configure is a Kubernetes Secret that will hold our dockerhub credentials.
➜  export REGISTRY_SERVER=https://index.docker.io/v1/
➜  export REGISTRY_USER=<your_dockerhub_username>
➜  export REGISTRY_PASS=<your_dockerhub_password>
➜  export REGISTRY_EMAIL=<your_dockerhub_email>


➜  kubectl create secret \
    docker-registry dockerhub-registry \
    --docker-server=$REGISTRY_SERVER \
    --docker-username=$REGISTRY_USER \
    --docker-password=$REGISTRY_PASS \
    --docker-email=$REGISTRY_EMAIL

Resault
secret/dockerhub-registry created
Alright, we are ready to start building Docker images with kaniko. For this demo we’ll use a simple Kubernetes pod that looks like this:
apiVersion: v1
kind: Pod
metadata:
  name: kaniko-builder
spec:
  containers:
  - name: kaniko
    image: gcr.io/kaniko-project/executor:latest
    args: ["--context=git://github.com//Imoustak/kaniko-build-demo.git",
            "--destination=moustakis/kaniko-build-demo:1.0.0",
            "--dockerfile=dockerfile"]
    volumeMounts:
      - name: kaniko-secret
        mountPath: /kaniko/.docker
  restartPolicy: Never
  volumes:
    - name: kaniko-secret
      secret:
        secretName: dockerhub-registry
        items:
          - key: .dockerconfigjson
With everything set, let’s go ahead and kickstart the build by spawning this pod in our cluster.
kaniko-build-demo git:(main) kubectl apply -f pod.yaml
pod/kaniko-builder created
➜  kaniko-build-demo git:(main) kubectl logs kaniko-builder -f
Enumerating objects: 10, done.
Counting objects: 100% (10/10), done.
Compressing objects: 100% (7/7), done.
Total 10 (delta 1), reused 7 (delta 1), pack-reused 0
INFO[0001] GET KEYCHAIN
INFO[0001] running on kubernetes ....
E1019 16:02:18.955083       1 aws_credentials.go:77] while getting AWS credentials NoCredentialProviders: no valid providers in chain. Deprecated.
	For verbose messaging see aws.Config.CredentialsChainVerboseErrors
INFO[0009] Retrieving image manifest ubuntu
INFO[0009] Retrieving image ubuntu from registry index.docker.io
INFO[0009] GET KEYCHAIN
INFO[0012] Built cross stage deps: map[]
INFO[0012] Retrieving image manifest ubuntu
INFO[0012] Returning cached image manifest
INFO[0012] Executing 0 build triggers
INFO[0012] Skipping unpacking as no commands require it.
INFO[0012] ENTRYPOINT ["/bin/bash", "-c", "echo hello"]
INFO[0012] GET KEYCHAIN
INFO[0012] Pushing image to moustakis/kaniko-build-demo:1.0.0
INFO[0017] Pushed image to 1 destinations
As simple as that. Our pod grabbed the dockerfile(and any other needed files) from our GitHub repository(our defined build context), build the image, and pushed the result to dockerhub. Let’s head to dockerhub to validate that.
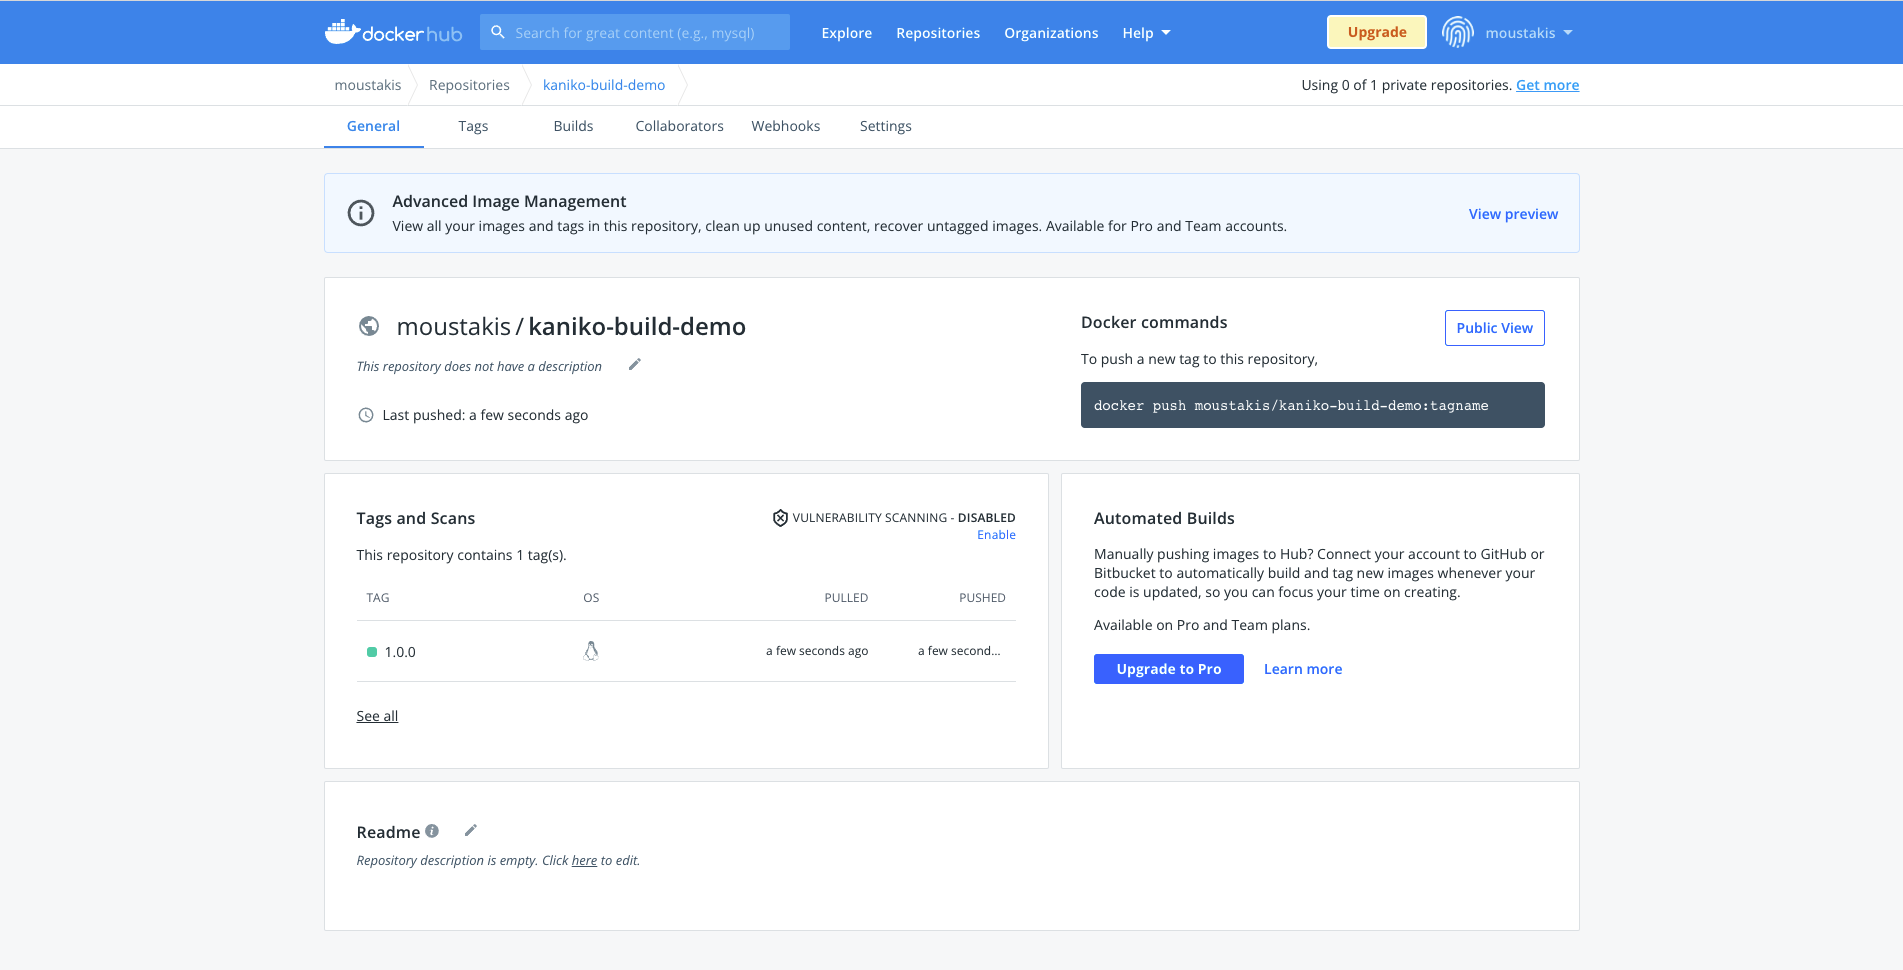
Sweet! Our newly generated image is pushed successfully there.
Another nice option that we can set is caching layers created by RUN and COPY (configured by flag --cache-copy-layers). Before executing a command, kaniko checks the cache for the layer. If it exists, kaniko will pull and extract the cached layer instead of executing the command. If not, kaniko will execute the command and then push the newly created layer to the cache.
Users can opt into caching by setting the --cache=true flag. A remote repository for storing cached layers can be provided via the –cache-repo flag. If this flag isn’t provided, a cached repo will be inferred from the –destination provided.
Different registries for pushing images are also supported apart from dockerhub like Google GCR, Amazon ECR, JFrog Container Registry, JFrog Artifactory.
In case we need to debug something in the kaniko container, we can use the debugger image gcr.io/kaniko-project/executor:debug which contains a shell.
That’s all folks, hope you enjoyed this. We explored an alternative to Docker, kaniko, for building Docker images without any special privileges or permissions.